I do believe that I had promised (way back when) to show how I put a loop and button closure on the inside of a skirt with a facing finish at the waist. One really does need some "insurance" at the top of the zipper, but with this style, a hook and eye closure ends up poking into your side (ouch!). So - here goes. If my explanation makes no sense - hopefully there are enough pictures to illustrate.
Oh, right - this only works with an invisible zipper, which seems to be my zipper of choice on skirts and dresses these days. Zipper is in at this point, and you're ready to sew on the facing.
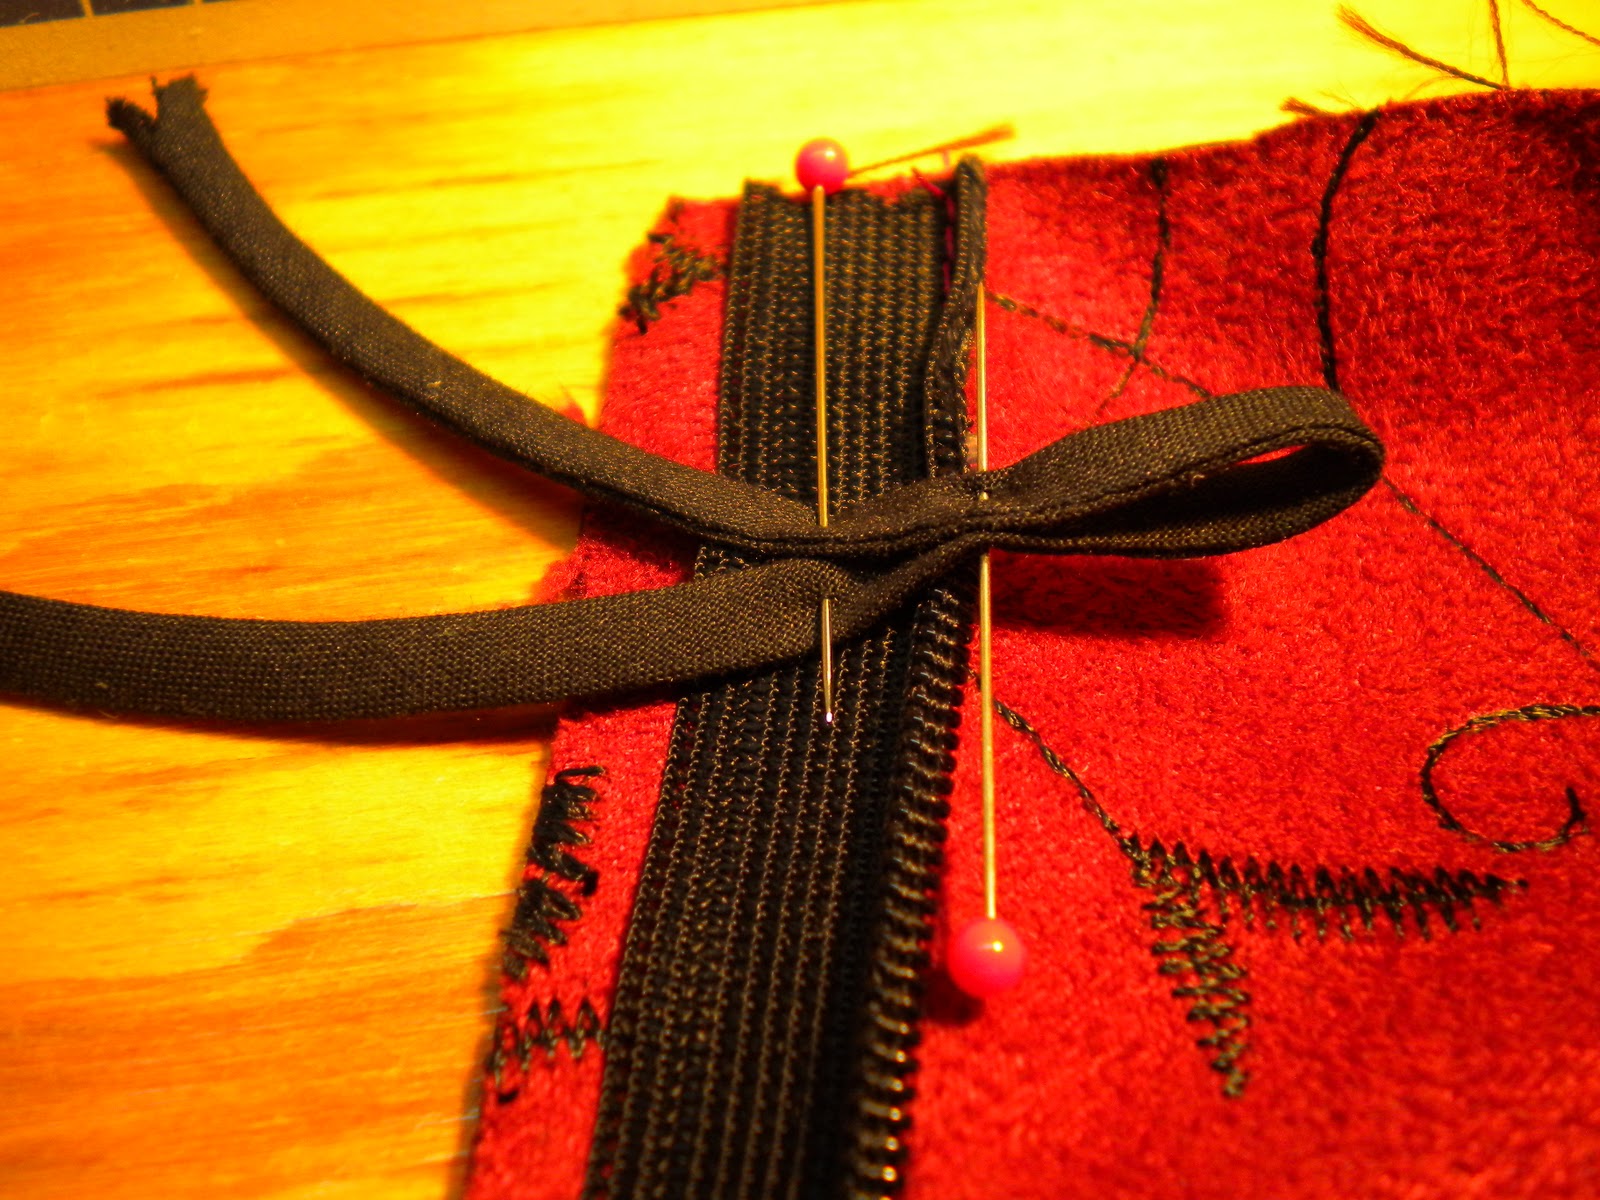
Choose a flat button. (Buttons with shanks will poke into your side.) About 1/2 inch or so. (Good way of using up odd buttons - no-one but you will ever see this!) You will also need either a piece of very narrow ribbon or a piece of bias "spaghetti", which is what we have here. Wrap the button with the ribbon and pin. This is how big your loop needs to be.
Position your loop below the seam allowance at the waist. In this case the seam allowance was 5/8 of an inch, so the loop is at about 3/4 or 7/8 of an inch below the edge.
Stitch the loop on within the seam allowance.
Place your facing right sides together with your skirt and stitch within the seam allowance. Do the same on the other side of the zipper seam.
Pin the facing along the top edge of the skirt, wrapping the seam allowances to the wrong side of the skirt.
Stitch facing to skirt. At this point I always turn the facing right side out, just to check that everything is where it should be. Turn back to inside out and trim the top seam allowance. Of course, if you're smart and you reduce the seam allowance while you're cutting, you won't have to trim at this point.
Now all you have left to do is understitch the facing, press and sew on your button.
And there you have the "ouchless" method of making sure that your skirt is going nowhere, should your zipper fail.


Irene, that's brilliant. Thanks for sharing the tutorial.
ReplyDeleteA great technique, Irene!
ReplyDeleteThis is genius! It looks very tidy and do-able.
ReplyDeleteYay! Great tutorial! This is a great idea to support the final closing of the zipper and relieve tension here. You are very clever!
ReplyDelete