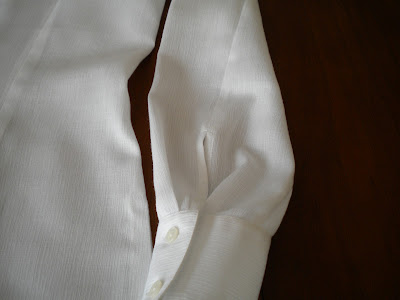
Now for my version.
I had quite a lot of fabric left from the previous blouse, so it's the same stuff. I'm not happy with the way the seams pressed, but it is chiefly polyester, so what did I expect? As for the actual design - I like. What I don't particularly like is the 2 piece sleeve.
No placket, just a slit with seam allowances turned under and, as always, an awkward jump to the serged seam allowance. When doing "quick and dirty" tops, I just serge both seam allowances together and press to one side, a la RTW. I think I'll redraw the sleeve for future versions of this shirt, and I'm sure that there will be a few, with minor (design) alterations.
Now for the real beef. I've been reading how happy everyone is about the multiple cup sizes on patterns, so where is the A cup pattern piece? OK. So this is not one of those patterns. This one gives fit instructions by Palmer/Pletsch. So where are the instructions for SBA?
Seems as though there's some discrimination going on. Now, back in 19__ (the dinosaur age) everyone wore shirts/blouses rather baggy. Didn't bother me to be a bit baggier than the rest. (I was young and stupid, what can I say.) Then, not too long ago, well, in the last decade - fitted was the name of the game. I also started doing alterations for a high-end boutique. I really started to notice that may-be my fit needed to be fine-tuned. I learned the pivot method of adding and decreasing to the pattern. It worked. Sort of. I found instructions for pleating out excess pattern. Didn't always work satisfactorily, depending on the style. Mind you I can make a FBA as well as any one, because, it seems, the only ladies who sign up for the fitting class are those who need to expand the pattern, and any clients that I had for custom sewing all had this same blessing. I am, essentially, self-taught. I'll try anything new - I seek out new - that's the only way to learn what works and what doesn't work. So for this shirt I decided to just do the opposite of what the instructions said for FBA. It worked!
I split the pattern along the lines, as instructed and slid the piece in, instead of out. Dart gets smaller. No excess fluffiness at the apex.
For the back, I did my usual pivot decrease method. Generally I need an 8 to fit in the shoulders. From there I need a 4 (A cup) at the bust. By the waist I'm back to an 8, and hips definitely need an 8. After much measuring I decided that the 6 would fit at the shoulders. According to the numbers on the pattern, the 6 would have done in the hips - well, yes, but just how snug a fit do I really want? For future versions it got redrawn back to an 8 for the hips.
And did you notice the pictures? It helps to read the camera manual! There is still much room for improvement, but there's progress.


What a beautiful white shirt! Every wardrobe has to have a white shirt and yours is particularly lovely, it's a great classic style
ReplyDeleteNot a boring basic at all, it's beautiful! A crisp white shirt is an essential in every well dressed woman's wardrobe, and yours is particularly lovely.
ReplyDeleteThankyou for visiting and commenting on my blog!
Looks like a winning blouse to me! I enjoyed reading the fit discussion. I would like to make up some of my older patterns, but have a hard time figuring out how to make a sba, most of the time. I will keep your method in mind. I do like Burda patterns though, because they tend to fit my small bustline pretty well without much adjusting.
ReplyDeleteThat's a lovely blouse. Looking forward to seeing another white shirt in the future!
ReplyDelete