Sunday, October 31, 2010

I am sewing - sort of

When I started this blog, I thought of it as a catalogue of finished projects.  By posting each project, I thought that I would "force" myself to sew in a more organized fashion.  I am certainly motivated by those of you who consistently post new items.  I too, could produce things at a rather consistent rate, or so I thought.  Reality sets in, every so often, unfortunately.  I seem to have a backlog of things that need attending to.  One, this week, had nothing to do with sewing.  I had a mass of paperwork that needed to be sorted, filed or shredded.  This is part of an ongoing project of moving things around in the house, the most important part of which is moving the sewing out of the "bat cave" by the furnace to the large room that used to be part office, part "family room".  I finally realized that I just had to bite the bullet and get the job done.  The carrot at the end of the stick is the fact that I will have a lot more room, and  I will actually have windows to see outside, even if they are small.  There's still a lot to do, but I think that I've finally overcome the most dreaded job, and I will now be able to get things moving more quickly.

Other backlog items seem to have nothing to do with MY stuff.  I seem to have accumulated a lot of my mother's mending.  She will call up and ask one of two things - "What colour thread do you have in your sewing machine?"  or "Could you come over  and rethread my machine?"  Hint, hint - she needs something mended.  It always seems easier to just tell her to drop things off, and to take care of them at some point.  Some point doesn't come around all too quickly, hence - a stack of things that really shouldn't even be in my house!  I decided that those really had to be gotten out of here.  Boring sewing, but it had to be done.  (Why do old people insist on mending things that should have been thrown out years ago?  Am I going to be like this, when I hit my eighties?  Perish the thought!  I will always prefer sewing something to new, to mending something old.)

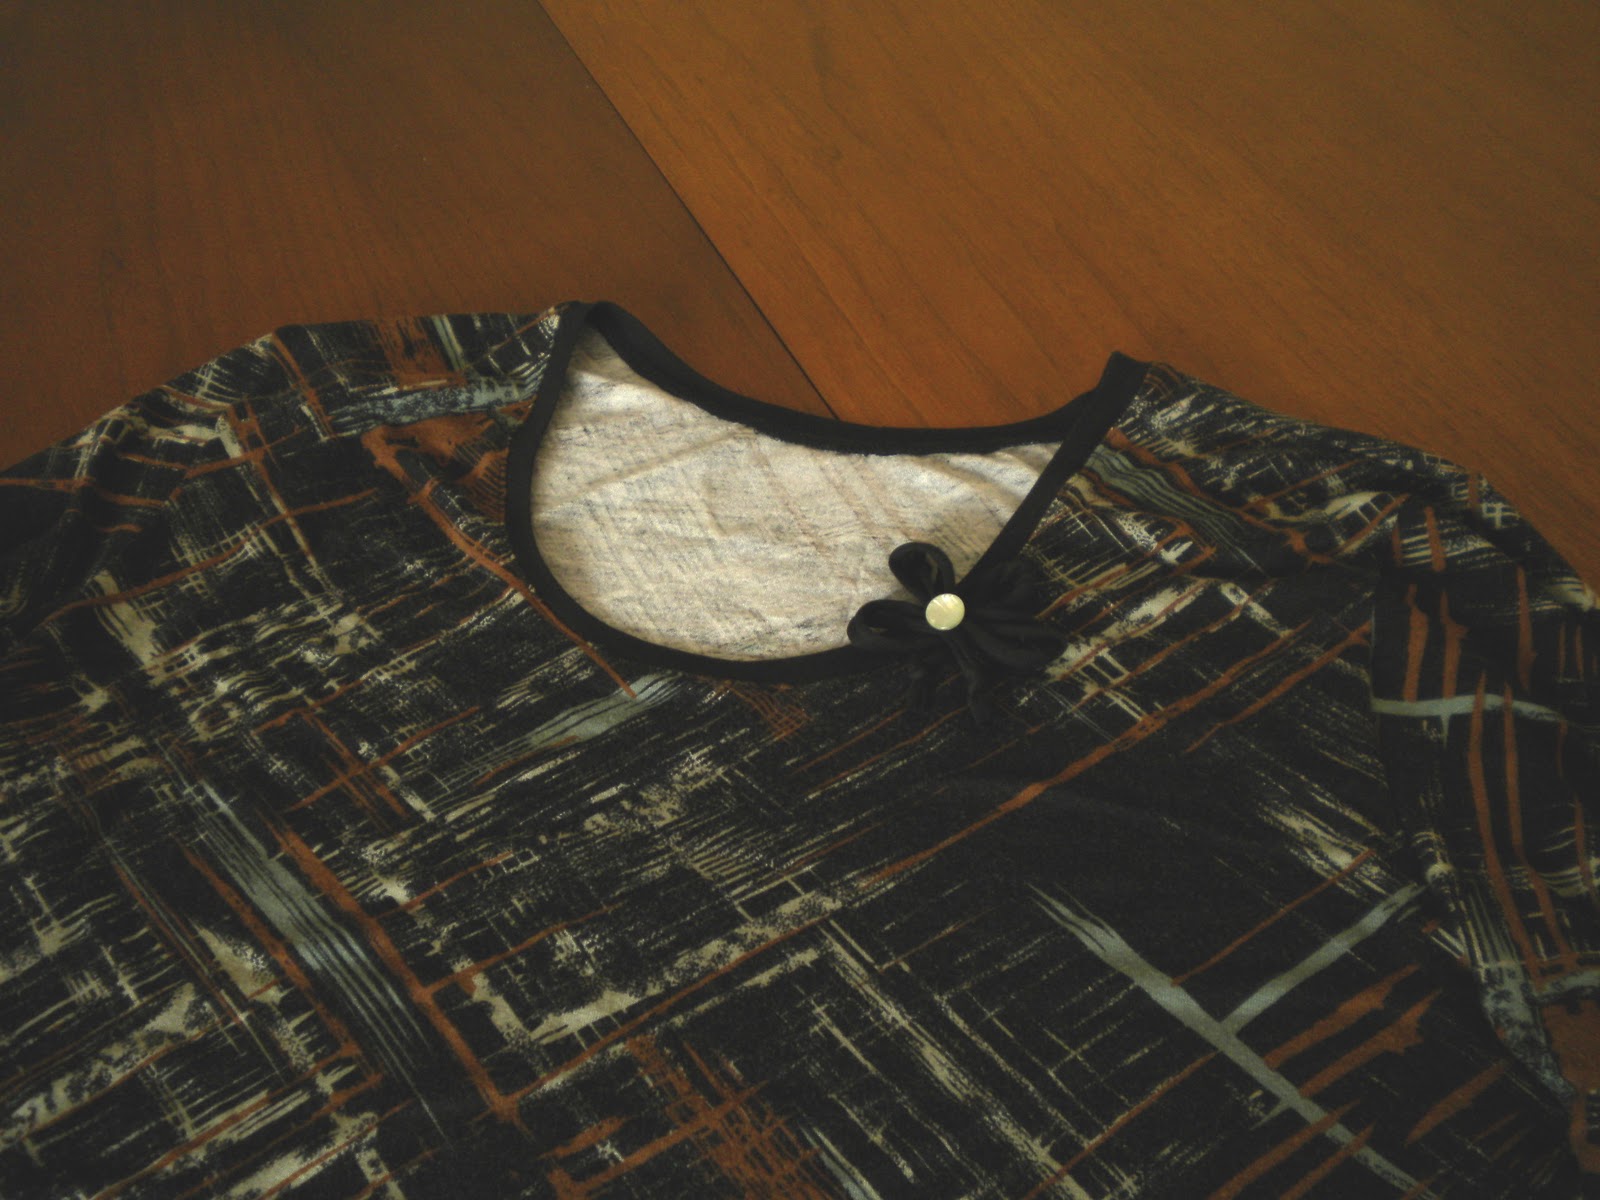
Thank-you for all your lovely comments, and to answer a few of the questions...  Yes, the satin stitching on the jacket was done on my regular sewing machine.  I've used this "cheater" method a number of times before - I don't even remember where I got the idea from.  It does end up looking like piping.  It also covers the raw edge of the facing beautifully.  The only trick is to play around with some samples to make sure that the stitching doesn't create tunneling on thinner fabrics, hence the stabilizer. 

And ...  I have actually been sewing something useful-to-the-wardrobe.  I started on a "suit".


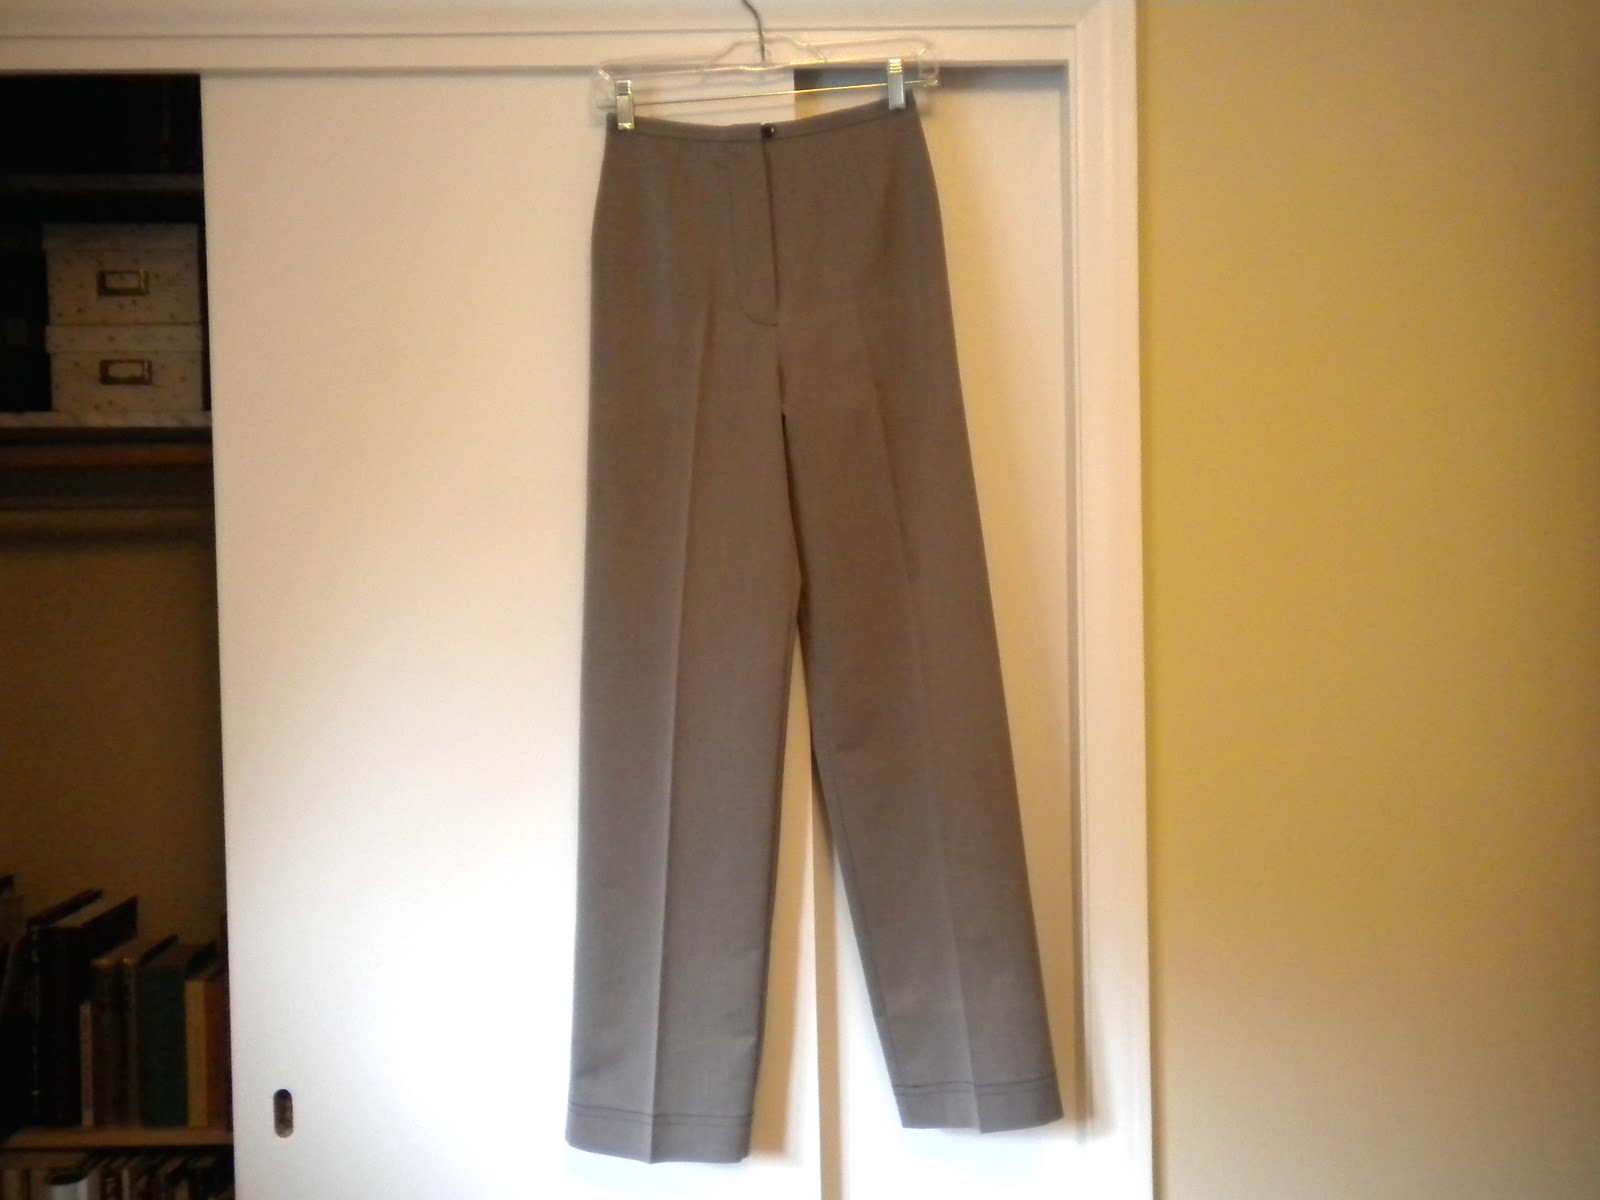
This is Vogue 1166.  I bought the pattern back in the spring.  Didn't get around to making it then.  Thought that I would leave it until next spring.  Then I saw it made up in wintry fabrics in the Vogue Patterns magazine, and that gave me some ideas.  I have a silk tweed that would work for the jacket.  Started pulling out fabrics that would go with the tweed, and what do you know - the beginnings of a "capsule" - if I persevere with sewing all the pieces.  Oddly enough, I did not begin with the jacket, as I usually do in these cases.  I started with the pants (and yes, I did add a fly front to these, despite the pattern!).  They're done.  On with the jacket.

On a parting note - I am trying to improve my photography skills, really I am.  It's all in the lighting, right?  As you can probably tell, I've been trying various locations in the house, since each room has more or less sun coming in.  I've noticed that many of you take your photos outside.  With winter coming - that is not an option around here.  Besides, I really have nowhere to hang things outside.  May-be I should have have paid more attention to what the photographer of the family was doing before he passed on to a better world.  But then, one never thinks of these things at the time.

Tuesday, October 26, 2010

Another one moves up to the closet

In April I had a wedding to go to.  Good reason to sew an outfit.  Had to be quick, because I was making the wedding cake, and that would take up time.  The dress was no problem.  I had made it before in various incarnations.  It was sleeveless and needed a jacket. 

I had picked up this KwikSew 3535 a while back, and it seemed to fit the bill.  Super simple.  No buttonholes.  No linings.  No fuss.  I knew that I would have to futz with the fit, but even that wouldn't be such a problem.  Well, it wasn't, except that I always manage to bite off more than I can chew, and the night before the wedding I still had "a few things" to finish on the jacket.  At 2 in the morning I had just put the last cake tier in the fridge, and I had to make a decision - sleep or jacket.  Sleep won out.  I did have another silk jacket that worked with the dress, and at least I had one new piece to wear.  Since I had no deadline anymore, the poor jacket languished in the sewing room right through the summer.  I finally finished the sewing.
 

The obstacle that seemed to stump me was the satin stitching around the facing.  (The facings are turned to the outside, then stitched down.)  I was worried about tunneling.  After many samples I finally decided on running heat-away stabilizer under the fabric as I was stitching - I wanted to be sure that no traces of stabilizer remained once I finished.  All worked well.  Then I read the directions for removing the excess stabilizer, which said to set the iron at cotton or linen.  Yikes!  Press cloth or not, I was just not willing to put the silk to such a test.  That particular stabilizer is a rather coarse woven, and I ended up pulling out all visible threads with tweezers - all around the jacket, and all around the sleeve hems.  Rather an arduous task, but - I was happy that I wouldn't do any potential damage to the silk, and nothing visible remained.  So this jacket has finally gone to live in the closet to await an event for which it will be appropriate.

The fabric is silk doupionni in what I call a toasted apricot colour.   (It was leftovers from somebody's bridesmaid dresses and had to be cut out of odd-shaped pieces.)  On the inside I serged the seam edges, then turned under the serging and stitched the edge down.  Well, only in the body of the jacket.  Nobody has any business peering up my sleeves to see how the edges are finished.  I also wrapped the armscye seam in self-bias.  The satin stitching is done in a variegated rayon embroidery thread, though I opted for a plain rayon thread in the bobbin. 

The front has darts, the back has some interesting-looking princess seams.


Look!  Even made tiny little ball buttons and loops!


And here it all is as the outfit that should have been.  
The dress is Vogue 8413, View A.


Writing in the middle of the day is SO MUCH easier than trying to do this at strange hours of the night!

Monday, October 25, 2010

Not so proud of the results

Following the less than perfect results of the t-shirts for my daughter, I thought I'd "whip up" a top for myself to  make myself feel better about sewing knits.  Well .....  Not happy.


The pattern is Vogue 7799, an OOP that I've had for years.  I've made it in all its views, with my own personal tweaks, many a time.  Piece of cake!  Not.  The fabric is a cotton rib knit that I picked up at Fabricland in the "knit ends" pile.  It's a purply-browny colour.  Very uncooperative stuff, to say the least.  The seams were serged easily enough, with differential feed engaged.  I didn't have enough fabric for the actual collar, so I decided to wrap the edge. 

That took much steaming, pinning, basting, and still it stretched out of shape.  It's passable, but barely.  Final bit - the hems.I was almost ready to pitch the whole thing, but I just can't stand to toss an almost finished piece.  I'm always determined that I can somehow make it work.  I topstitched with a double needle.  Stretched like crazy.  Ripped out the few inches that I had started, steamed it back into shape and decided to lay a piece of washaway stabilizer on top of the fabric, carefully adjusting the bit of fabric that was coming up to the presser foot.  Better, but far from perfect.


Once I was done, I tossed the top into the wash to get rid of the stabilizer, also praying that possibly any stretched-out bits would regain their shape.  Not really.  I'm not too thrilled with the results.  Now, given the type of fabric, I did not expect this to be a thing of great beauty, but I somehow thought that it would look better.  I'm actually wearing the top right this moment.  It's comfortable and feels good.  Possibly could wear it out of the house with a jacket over it.  My intent in buying odd pieces of interesting-looking knit is to gain confidence in sewing any type of knit.  I only seem to frustrate myself.  Part of the problem, I think, is my sewing machine.   I have issues with it, or it has its own issues, but for the moment I have to live with it, and maybe I should steer clear of odd types of knits for the time being.  May-be there are incorrigible fabrics that look awful, no matter what.  I have seen some pretty sad sewing on RTW items and I've always chalked it up to "factory sewing", but may-be there's stuff out there that even industrial machines can't do a decent job on

Sorry 'bout that top photo - looks like I need another session with the camera manual to make sure I'm in focus.

Wednesday, October 20, 2010

T-shirts for Taya

First and foremost I would like to thank everyone who has found their way to my blog.  I LOVE getting comments!  It now feels that I am not simply sending this into thin air.

Secondly - mea culpa.  I ranted about there being no A-cup size in the new multi-cup sized patterns (well, there isn't in the patterns I've bought), but Ann's lovely dress is from a pattern with an A-cup front.  I will definitely have to acquire that one and try it out!  I promise to do better research the next time I decide that I have to spout off about something.

With my daughter's (23rd) birthday coming up, I wanted to make her some things.  She's very far away, and she does like mama to make her things.  Last year it was a fuzzy robe and matching socks.  This year I really couldn't think what.  We're not the same size.  She isn't the size that she was when I last saw her.  She refuses to send me measurements until she loses some weight.  Well, t-shirts seemed to fit the bill.  Stretchy - forgiving in size.  I had been looking at all sorts of wonderful ideas of how to jazz up a shirt and I had all sorts of plans, but for some reason things just didn't work out quite as well as I had wanted.  My designer muse was failing me.  Add to that, the fact that anything bigger than what I wear looks huge to me, and then nothing looks right.  Then there was the pressure to hurry up and get all this done, pack it (and various other assorted things that she needed from her room) and get it to the post office.  I'm not thrilled, but here are the results.


One black t-shirt.  I used an old Kwiksew pattern (sorry, I just don't feel like running to the other room to look up the number - it's an old pattern - used many times before) - it does have more "shape" than what it looks like in the picture (bad styling on my part).  I lowered the neckline and I raised the armholes.  (I find that Kwiksew has impossibly large armholes and sleeves.)  This is a cotton knit, fairly stable and easy to sew.


Two black t-shirts.  This one is a rayon knit - very soft, very comfy-feeling, and not the easiest thing to sew.  I still have some of this fabric left for me, so you might see it again soon in an other version.


I had problems uploading the pictures, so they didn't happen in the most logical of orders here, but this is my sad attempt at a pleated ruffle.  I just serged around the neck edge, turned it under and stitched, then stitched on the ruffle.  The flower is just pinned on - something I made for a demonstration at the store a while ago, and it seemed to work on this shirt.  She can unpin it and wear it on something else if she wants, or not.


For the ruffle I just cut a width of fabric and started pleating.  It actually took 2 widths of fabric to have enough to go around the neck.  I pinned and basted, and when the two ends met, I joined them together and fudged the last few pleats.  I don't do mathematical calculations very well.


For this neckline I used a piece of black knit and applied it as you would do with ribbing.  The flower is the same black that I cut a narrow strip of, stretched and steamed it into floppy spaghetti, then looped, tacked and added a button.

And then there were scarves ...


This burned-out velvet I bought a few years back, with visions of a twenties-style evening dress.  Well, the dress hasn't happened yet, I really have no need to be dreaming up evening dresses, and I needed something for a scarf.  May-be I need a velvet scarf, too.  And may-be there could be a few Christmas presents in that one piece of fabric.  This was so easy - this stuff rips so well - no cutting!  I think I ripped off about a 24" piece, stitched with right sides together, turned right-side out and sewed up the "hole".  One downside - the fingers took some abuse from steam when I was "pressing".   


Then I had to use up the end of the flowered fabric for something, because I couldn't just toss it, and I didn't want to put it back on the shelf, so I made a neckring.  Nowhere near as elegant as Sharon's, but it is soft and cuddly.  If you want directions - visit Sharon.  There are also instructions in the last Vogue Patterns magazine (that's October/November 2010).


And now I really must go get some sleep.  I really do need to start these writing exercises a little earlier in the evening!

Friday, October 15, 2010

White shirt

Another boring basic, but I did want to try this pattern out.  I liked the fact that there are long darts front and back.  I tend to always tuck shirts in, and excess fabric looks, well, baggy.


Now for my version.


I had quite a lot of fabric left from the previous blouse, so it's the same stuff.  I'm not happy with the way the seams pressed, but it is chiefly polyester, so what did I expect?  As for the actual design - I like.  What I don't particularly like is the 2 piece sleeve.


No placket, just a slit with seam allowances turned under and, as always, an awkward jump to the serged seam allowance.  When doing "quick and dirty" tops, I just serge both seam allowances together and press to one side, a la RTW.  I think I'll redraw the sleeve for future versions of this shirt, and I'm sure that there will be a few, with minor (design) alterations. 

Now for the real beef.  I've been reading how happy everyone is about the multiple cup sizes on patterns, so where is the A cup pattern piece?  OK.  So this is not one of those patterns.  This one gives fit instructions by Palmer/Pletsch.  So where are the instructions for SBA?
 

Seems as though there's some discrimination going on.  Now, back in 19__ (the dinosaur age) everyone wore shirts/blouses rather baggy.  Didn't bother me to be a bit baggier than the rest.  (I was young and stupid, what can I say.)  Then, not too long ago, well, in the last decade - fitted was the name of the game.  I also started doing alterations for a high-end boutique.  I really started to notice that may-be my fit needed to be fine-tuned.  I learned the pivot method of adding and decreasing to the pattern.  It worked.  Sort of.  I found instructions for pleating out excess pattern.  Didn't always work satisfactorily, depending on the style.  Mind you I can make a FBA as well as any one, because, it seems, the only ladies who sign up for the fitting class are those who need to expand the pattern, and any clients that I had for custom sewing all had this same blessing.  I am, essentially, self-taught.  I'll try anything new - I seek out new - that's the only way to learn what works and what doesn't work.  So for this shirt I decided to just do the opposite of what the instructions said for FBA.  It worked!


I split the pattern along the lines, as instructed and slid the piece in, instead of out.  Dart gets smaller.  No excess fluffiness at the apex.


For the back, I did my usual pivot decrease method.  Generally I need an 8 to fit in the shoulders.  From there I need a 4 (A cup) at the bust.  By the waist I'm back to an 8, and hips definitely need an 8.  After much measuring I decided that the 6 would fit at the shoulders.  According to the numbers on the pattern, the 6 would have done in the hips - well, yes, but just how snug a fit do I really want?  For future versions it got redrawn back to an 8 for the hips.


And did you notice the pictures?  It helps to read the camera manual!  There is still much room for improvement, but there's progress.

Tuesday, October 12, 2010

While I'm deciding

While I'm sorting through patterns and fabric and deciding what to actually start with for the "serious sewing", I've been sewing a few things that require little thought.  I also tried a different room for photographing.  It's sunnier, and I thought that the pictures might turn out better.  Not.  I'll continue playing around (perhaps reading of camera manual might also be on the agenda), and hopefully, soon, I'll take much nicer pictures where you can actually see things in detail. 

The latest out of the "studio" are three pair of pants.  I used a pattern that I've had forever - Vogue 9537.  I just checked online, and the pattern is no longer available.  It's still a good basic pattern.  The leg is not too wide (which was the object of the exercise this time around).  I've tweeked it into submission over the years.  I just needed to add to the "what to wear every day while at home" wardrobe, especially now that the weather is colder.  I'm not much of a jeans person.  I don't find them comfortable.  Trousers that can be thrown in the wash are more to my liking - but they have to be comfortable!


These are a twill - I thought that they were a grey, resulting from black thread one way, white thread the other way.  Nooo!  When I took a scrap to the store to buy zipper and thread, I realized that it was brown and white.  Funny how fabric can be so deceiving.  For some reason I decided to top stitch two rows at the hem. (Not that you can really see that.)


These are green corduroy.  It's a sort of olivey green, medium wale (not so obvious in this picture).  I did fly fronts (OK - mock fly fronts) on all these pants.  That seems to be the norm in ready-to-wear, and I follow suit - whether the pattern is that way or not.  Why?  I was browsing pictures from fashion shows on In Style (?) and noticed that fly fronts are not necessarily the norm in the couture collections.  Then, I noticed that a number of the patterns that I've pulled out for suits also have back zips.  For fitting the back (dare I say butt) that would be a bit of a hindrance, but I suppose I could get around that by leaving a "get into" opening in the front for fitting, then sewing that closed and applying the zipper once I've unstitched  the back seam.  Hmmm.  If there's anybody out there actually reading this dither - any thoughts on where zippers should be on pants?  Am I the only one who thinks that if I put in a back zip it'll look weird?


Last but not least - a pair in light grey cotton twill.  These are actually a bit too light weight to wear now.  May-be I'll leave them for next summer.  
Boring.  I know.  For someone who teaches a class on fitting pants, I'm not very adventurous, it seems, in that department.  I don't necessarily like pockets, because they tend to show bulges.  I've tweaked this pattern and one other, Vogue 2532 (wider leg) and I can whip them out in record time.  Not that I don't have other patterns.  I have quite a few.  There are the Claire Shaeffer patterns from Vogue, pants that are part of suits, and I even ordered a pattern from Hot Patterns.  Have I even opened the packages?  No.  I really must get over this fear of new pants patterns.  Actually, I just have to get over my old habit of having to whip things out.  I'm supposed to be enjoying the sewing, so slowing down and taking time to explore new avenues is what I should be doing.  Like there's a monitor that checks that I've produced X number of items in a month.

Saturday, October 9, 2010

Wardrobe kvetching and a totebag

It's that dreaded time of year - wardrobe changeover time.  I spent quite some time yesterday pulling out the fall/winter clothing, moving out the summer stuff.  Then there was all the steaming, checking for necessary mending, etc., etc., etc.  I'm nowhere near done - and I don't even have that much in my wardrobe!  Well, I was in a less than perfect mood, because I received an e-mail that I did not get the job that I'd interviewed for earlier in the week.  I needed "busy work", hence the closet rearrange.  Needless to say, it was not happening in an efficient manner.  I was also trying to come up with some sort of plan of what to sew.  Seems I'm not the only one musing on wardrobe updates, etc.  I did not keep track of all the blogs that mentioned this - suffice it to say that other people have similar things on their minds.

My "work wardrobe" is tired.  I haven't sewn with much of a plan.  I had no time to do much more than "plug the holes" for quite a while.  Presently, I can make the time to actually plan things out so that I am not tearing my hair out when trying to put together an outfit.  I will have to work with what's in my stash - no money to spend at present.  There are workable pieces there.  I really should be using the patterns that I already have - again not to spend any money.  Now the major hurdle to get over - not falling into the rut of making just very boring basics.  Making some accessories that will pull things together.  Getting over my latest hang-up - I'm getting too old to wear anything trendy, all the while absolutely NOT wanting to look like an old frump.  In my head, I'm not much older than 25.  In reality, I'm twice that.

Enough of that already!  We need a picture here to brighten this up a little.  Last in the "samples for sewing classes" line-up.  A totebag that Joyce asked me to make.  This one is from Kwik Sew 3249, View A.


A tote is a tote - what can I say.


This one does have some nifty pockets inside and elastic straps for corralling your water bottle.  May-be I need one of these in a basic neutral, so that I have a "businessy" looking tote for when the time comes to march off to work in the mornings.

I have bee sewing all the while - I just need to download pictures to computer and take some more pictures.  I'm still in the learning process with all of this - I warned you.

Tuesday, October 5, 2010

Black velvet vest

We're always trying to come up with ideas at the store to attract new sewers.  Once they've taken the "Sewing Fundamentals" series and made pajama pants and top, they need more simple sewing projects.  A vest somehow fits the bill.


So here it is - my sample.  When I make up samples for classes, I try to choose things that I would actually want to have in my closet, but not something that I desperately need.  I've always wanted a black velvet vest.  It can move a plain white shirt up to party status in a jiff.  This one happens to be McCall's 5887, and it's View A that I did.  The fabric is an upholstery weight velvet, which to me seemed stiff enough without any interfacing, except, of course, behind the buttonholes.  I've been having some issues with my sewing machine and buttonholes on "less than ideal" fabrics, so I had to make a decision on how to handle this situation.  I did not want a disaster.  I had a deadline.  Well, I'm crazy enough - bound buttonholes it was.  (Oh - I also added one extra button - the pattern calls for 3 buttons - some respacing required. )  It wasn't all too bad.  I did hand baste all the bits in place quite well, so that nothing decided to move around as I was stitching.  It all worked well.  The lining was a piece of rust crepe de chine that was left over from a blouse from - I won't tell you how many years ago.  There's more...


Embellishment!  I love the embellishment on late 19th century and early 20th century clothing.  I didn't have time to get all too fancy, but I just thought that it would be rather nice to add something, since this wasn't going into the category of "office wear".  I doodled a design on a copy of the pattern that I made, lay on some carbon paper and traced it off onto the velvet.  I was also limited by what I had on hand, because these moments of inspiration always come at a time when all stores are closed.  I used some black soutache and fine black braid (cording?  twisted stuff).  Had to sew it on by hand.  The machine (always try a little sample!!) made a mess of the cord - with zigzag over top it looked awful.  Besides, I had visions of this slipping and sliding all over the velvet.  Much less stress - hand-sewing to the strains of Mozart.

Sunday, October 3, 2010

A blouse to go under the jacket

Well - a jacket needs a blouse to go under it, and since I also do a class on "fitting your top", this is again part of the "samples sewing" marathon.  This is McCall's 5661.  I did the bodice of Views E and D, and sleeves from View C.  There's a facing that I omitted, opting for a bias strip.  The fabric is some mix of polyester and possibly a bit of cotton.  I didn't buy it (it's from my dear sister-in-law's closet-cleaning session), so I have no clue.  Feels nice, but it is a bit crisp, and I didn't think that a facing would keep the tucks under control.  Well, that, and with the see-through quality of the white - a big facing would have been pretty ugly.   


 Why did these pictures turn out so yellow?  Oh well.
 And now (drum roll please) - the full effect - blouse under the jacket with a pair of black pants for good measure. 


I'll be wearing the blouse tucked in, because with this type of jacket I think it will just look better.  When that will be - who knows.  For now, the whole ensemble is hanging at the store for all to see, and hopefully to be inspired to sign up for classes.   


Let's try this blogging thing out

Ever since I discovered sewing blogs, I've wanted to join the fun.  I love to read about other people's creations, to read the comments, but so far I've only been "lurking".  First the problem was - no camera, therefore no pictures to show.  Then I bought a camera, but...  This procrastinating has been going on long enough.  Time to take action!  So here it is.  My pictures are far from perfect.  (I'll learn.)  I have no body double, no other person to take the pictures (haven't taught the dog yet), and I haven't figured out the timer thingy on the camera.  So - the items will be on hangers.  May-be that's a good thing - no-one will be able to see whether things fit or not.  You'll just have to take my word for it!

I'm cheating (and will be for the next few posts) - I made this about a month ago.  I was taking pictures of things I'd made - I just wasn't going anywhere with them.  So - I'll start the ball rolling with things that were made in the last month or so.


I made this jacket as a sample for a tailored jacket class that I do.  It's Butterick 4028 (OOP).  The fabric is something I picked up in the clearance section at Fabricland some time ago.  Not exactly a tweed.  Not exactly a boucle.  Probably the infamous "unknown fibres" - though I think that it has a fair percentage of cotton.  We'll see how it will wear - it was leaving fuzzies all over the sewing room.  I added pockets (not in the pattern).  Sewed the trim on by hand, because that is SO much safer.  I had visions of having to rip and doing damage to fabric and trim.  For a closure - 2 brass buttons with some Celtic-type design and a piece of chain that I highjacked from my jewelry drawer.  And for now this jacket is hanging in Joyce's Sewing Shop, and not in my closet, but it will come home.


And why, oh why does the lining look buckled?  It really does hang properly - really!!