Saturday, June 22, 2013

My summer classes

The best laid plans...  I'm so slow with blog posts, that my summer class samples immediately follow those from winter.  Just bear with me - I will get back to "normal" - whatever that is.
I refused to do pyjamas yet again, ( I really did need a break from the same old pj pattern), so for beginner classes....
The skirt is Kwik Sew 3877.  I got the idea while watching the BBC Sewing Bee.  There are darts, a zipper, a waistband and a hem ... and only two main pattern pieces.  All the basics in a simple project.  The blouse is the Sewaholic Pendrell.  Guess I'll be in trouble if those who sign up are not pear-shaped figures - I'll be busy helping them to alter the fit.  Oh, well - not like I get to sit around and snooze in any sewing class.
A close-up of the fabrics
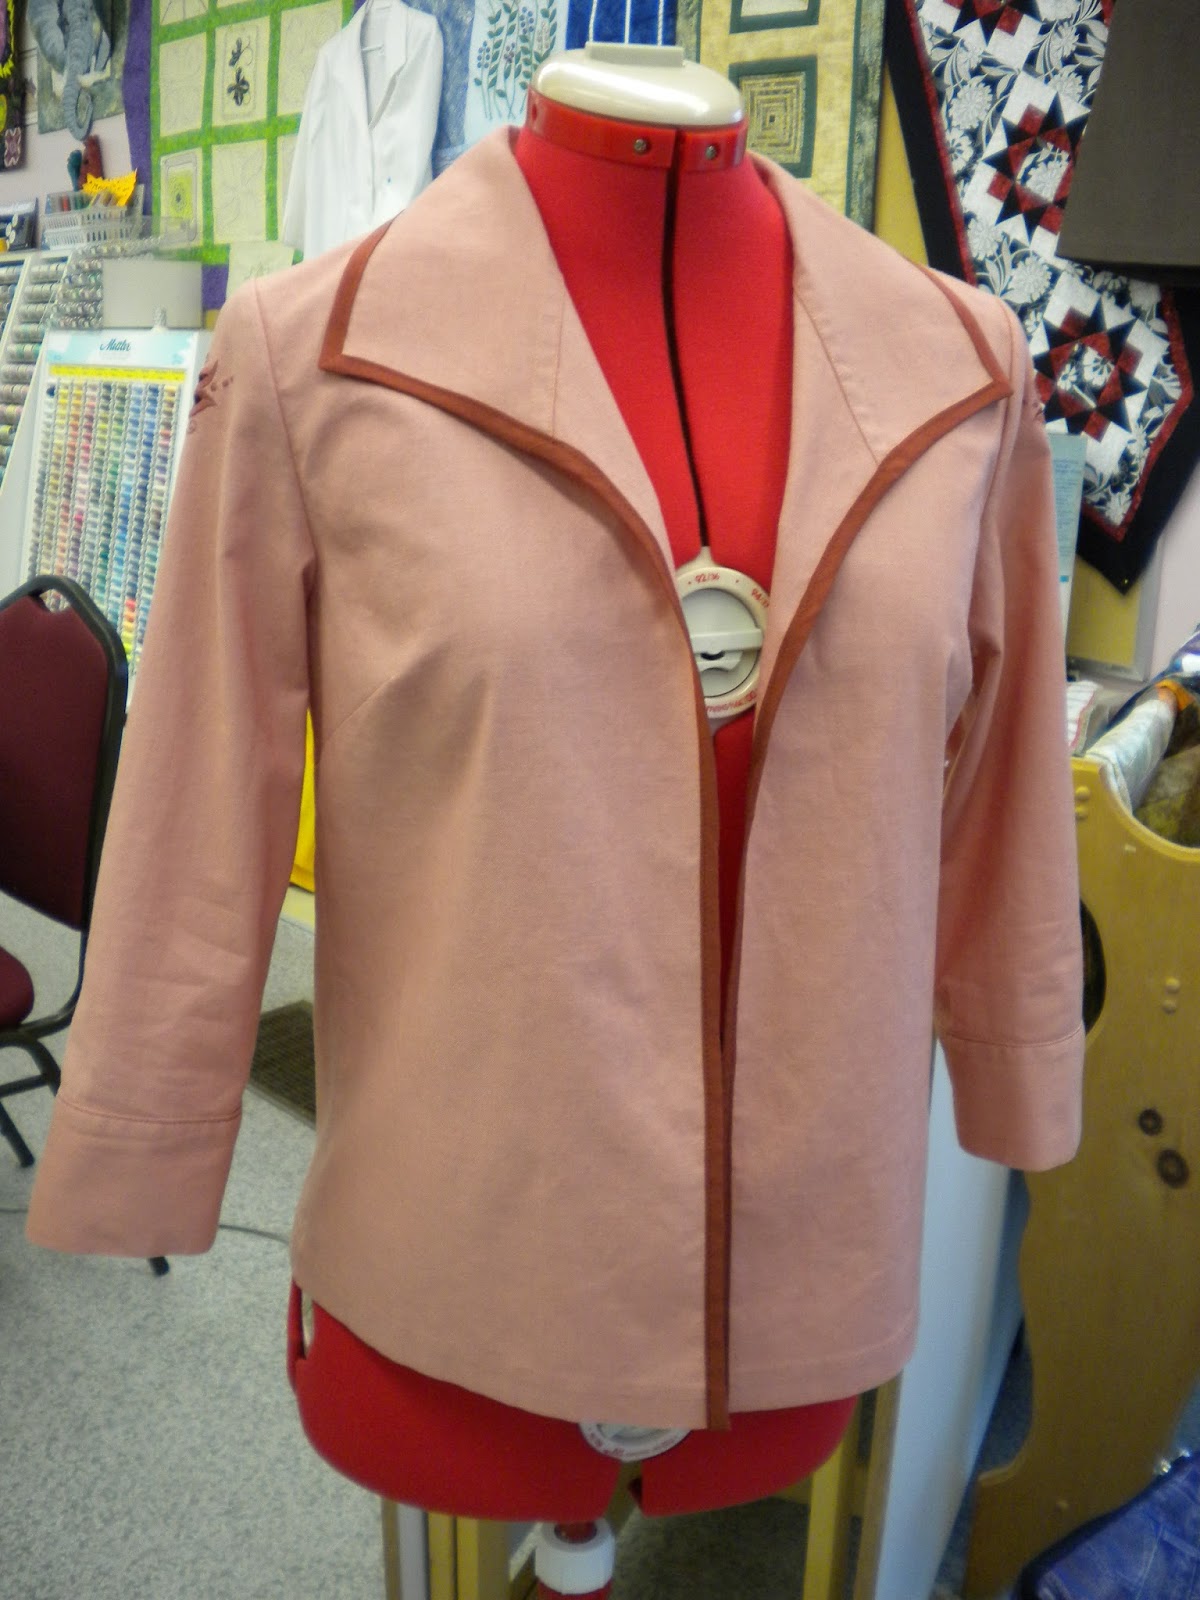
I thought that the lighting in the store was quite good, but obviously those fluorescent lights do little to help in showing the true colours of fabrics.  This jacket is actually a coral, but it looks to be quite a hideous orange.  (Probably not a good combination of coral fabric on red mannequin either ...)
Back side first, because that's the star attraction.  The idea behind this class is to get people with embroidery machines to use them on something other than quilt blocks and bags.  Cutwork seemed to be the right choice for summer wear.  Oh - the pattern I used is Kwik Sew 3620, with major changes.  One layer for the collar, no facings - easy, easy, easy.  I think that watching the machine embroider took longer than actually sewing the jacket - binding included.
The sleeves needed some embroidery, too - couldn't have them look naked.  (And in case anyone is interested - the cutwork design is on the menu of the Huqvarna Diamond Deluxe - design No. 127, I believe.  ... and no, I do not have this machine at home - I embroider at the store, where I can pick and choose which machine I want to work on - not that such things happen all too often.)
The front is very plain, but there is a point where one could overstep the maximum of allowable embroidery on an article of clothing.
That's all for now.  I'll continue getting inspired by everyone else, and hopefully get my act together to show more pictures sooner rather than later.

Thursday, June 6, 2013

<a href="http://www.bloglovin.com/blog/2096966/?claim=37ukqufe6xg">Follow my blog with Bloglovin</a>

Thursday, May 23, 2013

Classes - Winter 2013 - Part 2

Last of my class samples for January to June.
Butterick 4028 - chopped shorter
My "cheater" version of a Chanel jacket.  Instructions for a quicker version of this jacket are found in Threads Magazine No. 128 - January 2007.  I would love to tell you that this is some wonderfully amazing tweed fabric and lovely silk charmeuse lining, but ... it's not.  I had the idea for this class, wrote up  the class description for the store newsletter, all the time thinking that I would just order some fabric on-line, because the probability of finding anything decent at Fabricland is next to nil.  Of course, I managed to lose track of time because of one thing and another, and the next thing you know - I should already be sewing this jacket, and  - no suitable fabric.  Off to Fabricland to find something - anything half-way suitable.  Nothing.  Not anything even remotely related to what I needed.  In a last ditch effort, I headed to the clearance section, which happened to be at 50% off that day.  There it was - "unknown fibers" very loose somewhat tweedy-looking stuff for the unbelievable price of $2.00 a metre.  This certainly has to be the world's cheapest Chanel jacket knock-off.  With such, um, "exquisite" fabric, I was not about to waste any precious silk for lining, so that is grand old polyester charmeuse.  Didn't bother spending money on a chain for the hem.  It is what it is.  I did underline with voile, though.  Don't know that it will help with stability in the long run.  Just from hanging in the store, there are already a few snags in the loose weave.  I'll wear this for as long as it looks decent, but I did have my sample done on time.  It's still a lot of work, but much, much faster than the true method of putting together a Chanel jacket.  I now know that I can do this, so the next time I decide to make one of these - I'll definitely take the time to source out nice fabric, because all that work certainly deserves a lengthy lifespan.
For trim, I just used the selvage and some braided trim that I had in my stash.
Kwik Sew 3553
And, of course, we had to have yet another pair of pyjamas for the "Fundamentals" classes.  Nothing exciting about these - I'll be whipping these out in my sleep soon, but it is nice (I think) to have a new sample to show with every new class schedule.  Poly/cotton, and I thought that adding a bit of lace would help to make them a little less boring.
Now I'm working on samples for my summer classes.  No pyjamas this time around!

Friday, May 17, 2013

Classes - Winter 2013

I knew that I would have to step up my blogging if I was to make up for lost time, but somehow a post a day to bring you up to the present just isn't happening.  How about highlights over the next few posts?  I'll skip the boring stuff - does anyone really need to see each and every pair of boxers that I send off to my son?  (I even forgot to take pictures of the last two pairs.)  So we'll back up to January's marathon of sewing when class samples were made in two weeks flat.  I really wracked my brain to come up with projects that would interest people, and here's what I came up with.
My "Sewaholic display".  The ever popular Minoru jacket, which I made in denim.  The fabric was a tad heavy, but it all worked out.  It was interesting to see the variety of fabrics that my students chose for their jackets - from a very plain khaki (with a rather wild lining) to a spectacular floral.  Makes me wish that I had picked something a little more "wow".  Under the jacket is the Renfrew top, which was one of the choices for the t-shirts class.  ( I absolutely love that cowl neck!)  The skirt is the Hollyburn.  I lengthened it a bit, because I'm the one who's going to wear it once it comes home.
I was attempting some sort of co-ordinated look for the display, and I was asked to showcase at least some fabrics from the store, hence the excuse to finally use the batiks that I'd been drooling over for a while.  One note about the skirt...  the large-scale print was not a smart choice.  I attempted to line up the designs, across the skirt, but batiks are not a "perfect" print, and it turned out to be a rather daunting task.  Several months later, now, it doesn't seem to bother me anymore that the placements aren't so perfect.  Batik is batik.
The back view - just because.
On to my "Pamela's Patterns" display.
This mannequin is extremely tall, and it really bothers me that the outfit is all out of proportion, but - what can I do?  There's the Perfect T-shirt, the Bias skirt (in purple, for my daughter) and the Draped Cardigan.  I used ponte knits for the cardigan and the t-shirt (and for the Renfrew, for that matter).  I know that everyone is raving about this fabric, and though it was easy enough to sew, I haven't had a chance to wear these yet, so I still don't have an opinion.  I did choose ponte that had rayon in it.  It seemed softer to the touch than the polyester.  Can't wait to bring these things home so that I can actually wear them!  And I guess that would mean that other samples would have to be put in the store .. so guess what I'm sewing at the moment!
I'll call it quits for tonight, and I'll show you more later.

Thursday, May 9, 2013

How-to on the Minimalist coat

So ... as promised ... the how-to of the seams on double cloth...
Double cloth is two layers of fabric stitched/tacked together throughout, so that you have a double-thick fabric.  I've only ever seen it in wool - I don't know if this fabrication is possible in other types of fabric.  It's sewn together with what, essentially, is a fancy version of a flat-felled seam.
Think of this as attaching 4 layers, but you sew 3 of those layers together, then hide the seam allowance between layers 3 and 4.  Clear as mud?
Once you've cut your pieces, you have to decide which way you will be pressing your seams - i.e. to the back or to the front.  I chose to the back.  I had to peel the fabric of the back piece from the edge to 1/4 inch beyond the seam line.  To make this easier, I basted at 7/8 inch .  Only later in the process I realized that basting with a bright coloured thread actually made it easier to see when I had finally reached the basting line, because you can see that stitching between the layers of fabric.
Peeled edge
Peel ever so carefully, snipping the little threads.  I tried the seam ripper, but then switched to my smallest scissors.  No holes allowed. 
Next you pin the unpeeled piece to one layer of the peeled piece.  ( I believe that this is an armhole seam in the picture, which is why it looks curved.)
Then you stitch the seam at 5/8 inch.
After stitching - all seam allowances get cut down to 1/4 inch.  On the straight seams, I used a rotary cutter and my little 6 inch gridded ruler ( I like to torture myself), checking constantly to be sure that I was right on the line.  On the armhole (curved seams) I marked the cutting line and cut with scissors.
Press the seam allowances of the "3" layers into the opening, and the 4th layer is turned under to enclose all the raw edges - somewhat like adding binding.
And then - you stitch by hand.  I used tiny little felling stitches, which I find easier to keep even than a slipstitch.  After pressing, they sink into the fabric and disappear quite well.
What really had me puzzled was how to deal with the ends of seams that would then be turned in on the edges of the coat.  I figured it out when I got there.  You have to peel both edges right at the very end, to give you the two layers on the edge that can be turned in for the "hem".
I left very long threads  at the ends of the seams and then used that thread to finish off the seam stitching by hand.
This can now be turned in from each side to make the hem.
The hems have to be stabilized somehow, or they'll surely stretch.  I looked for very narrow twill tape, but couldn't find anything narrow enough.  What I found in my trims box, was silk knitting ribbon (now where did that come from???)  It's very  narrow - just what I needed, and very thin - no unnecessary bulk, and very stable - also what I needed.
The ribbon got sandwiched into one turned edge of fabric, basted (because it wasn't behaving well, and had to be put in its place), before the other edge was turned in and and the whole edge was slipstitched.
So that's the story of my grey coat, plain and simple.  (I have to admit, sewing while holding a camera in one hand is not the easiest feat.)  Since we had cold weather lasting for much longer than anyone wanted, this coat has had quite a number of wears.  It's surprisingly warm, incredibly light-weight, and I really am glad that it finally made into the closet.
If you want professional pictures of the process, in pretty colours - not my blah grey, check back to Issue 123 of Threads from February/March 2006 - there's an article by Anna Mazur on this wonderful fabric.  (Page 60 - to be exact.)

Friday, May 3, 2013

Thank-you

I would like to thank Ellen very much for nominating me for the Liebster award.  I really do appreciate the honour - and this time I did not miss the comment, however...  This did send me into a frenzy of trying to find other bloggers who fit into the prescribed category, who had not yet received the award.  This flurry of activity went on for a number of days, at which point the fun went out of this whole blog thing.  More days passed, and I was embarrassed that I still hadn't responded - very rude of me, and that sent me scurrying off into my little shell, because the longer one doesn't deal with something, the more daunting it becomes.  So ... after much thinking,  (and very much wanting to crawl out of my shell and back to "normal") - I've decided that I just need to adopt the policy of not accepting awards.  I know I'm not the first.  Thank-you very much for thinking of me, but I just can't "deal with" the extra stress.
... and I would like to thank everyone for the lovely comments on my coat.  Only other sewers can be so supportive of such make-work endeavours.  A post on the process is coming - but not until next week.  So's not to leave you with no pictures... my tassels...
Two bits of fringe, a piece of ribbon and some cording that must have been kicking around in my box of trims for at least 10 years.  A little bit of time to stitch them together and now I have a little bit of nonsense that makes me smile.  Why didn't I make these up years ago?

Saturday, April 13, 2013

Minimalist coat

I really did not mean to go off the radar for quite so long.  "Stuff" got in the way of normal blogging interaction, and the longer I stayed away, the more difficult it seemed to get back to "normal" - whatever that is.  Once again, I'm terribly embarrassed, because I did not reply in a timely fashion to the Cennetta's nomination for a blog award.  Thank-you so very much for the honour.  Now it's far too late to continue that thread and I apologize for being such a dud.
I must have the blogging mentality now well ingrained, because despite the lack of posts, I did photograph almost all that I sewed during my absence from here.  Shall I start at the latest ?  (Well, the last that was actually photographed.)

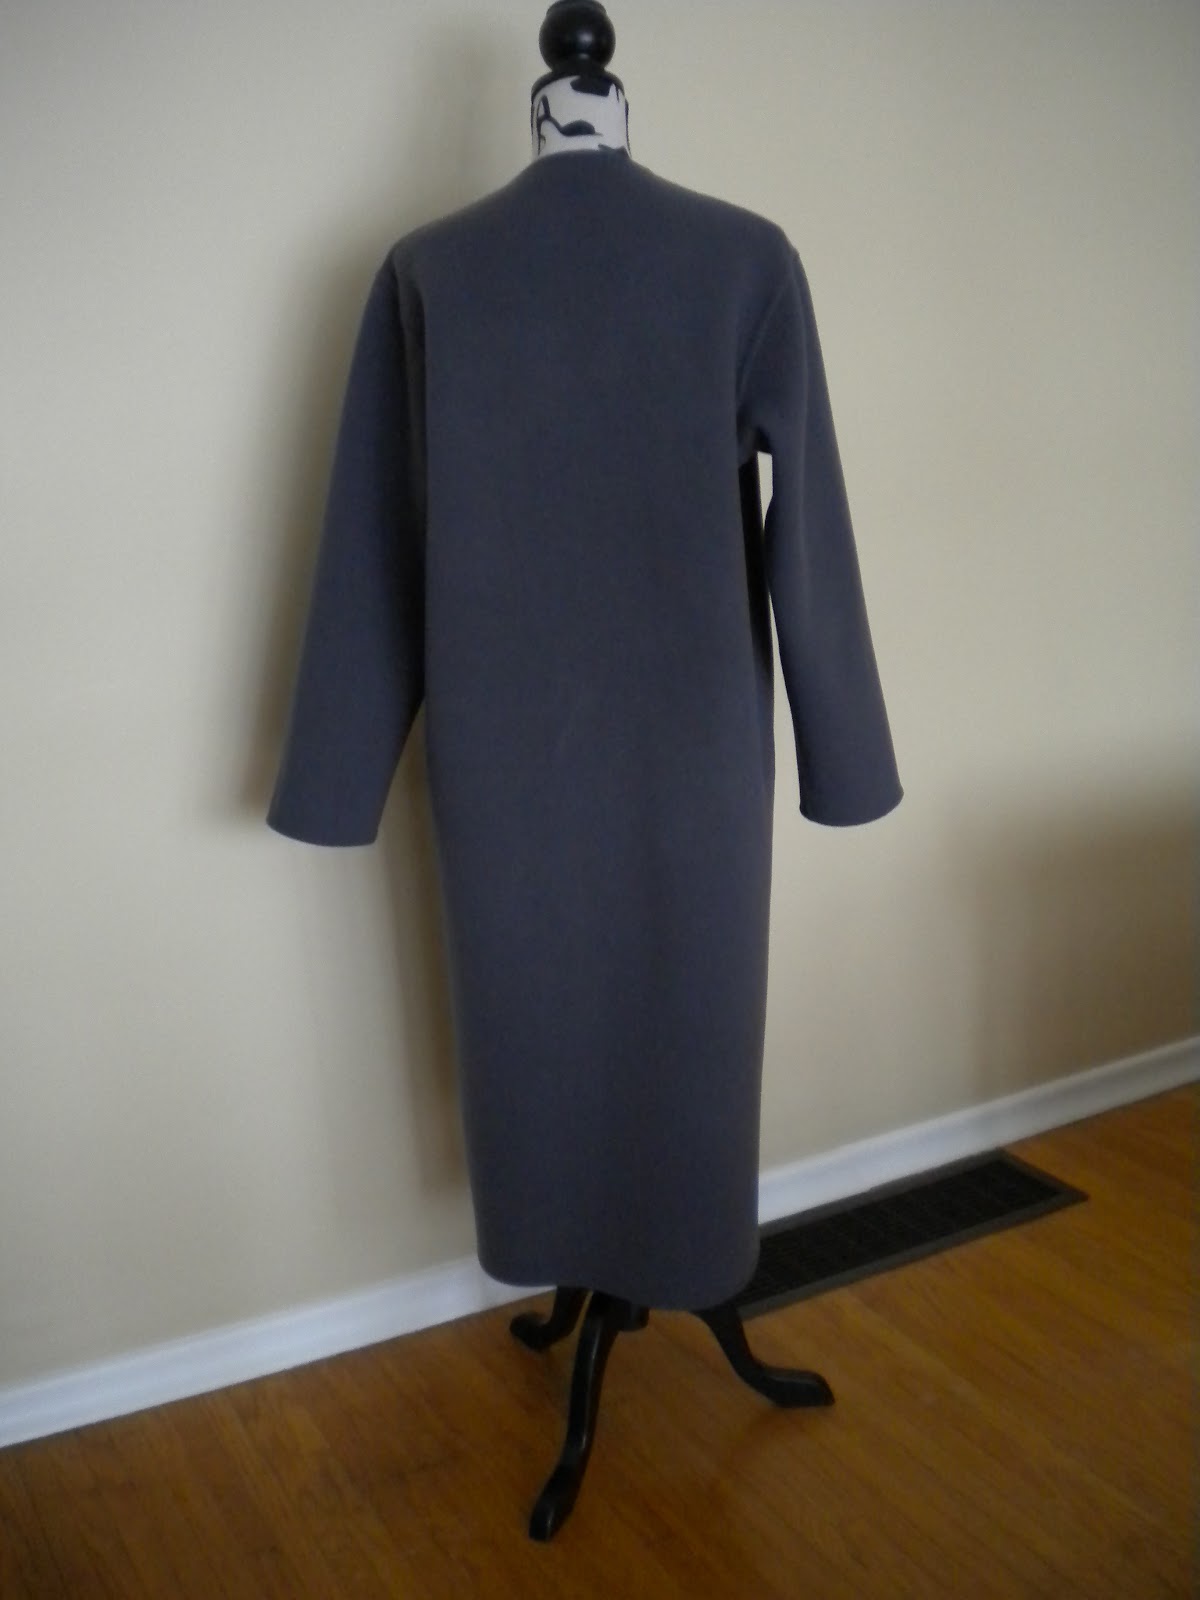
My UFO coat from last winter.  I desperately wanted to make a double-cloth wool coat when I used to do alterations years ago, because altering the seams done in this style is absolutely NO FUN, and I wanted to see what it would be like to put something like this together from scratch.  Somewhere down the line I did acquire a remnant.  It sat around for a while (like a few years), and last year I finally started on it - rather late in the season.  The weather warmed up and I abandoned the project, thinking that I'd be much more "moved" to work on it in cold weather.  One thing and another, and this poor coat was not getting the attention it needed.  Besides, it's not really a "dead of winter" kind of coat - more of a "it's really cold, but not quite cold enough for snow" kind of coat.  By the end of February I decided that it was "do or die", and if I didn't get a move on it, this coat would once again get packed away for the summer, and I was really determined not to pack up any winter UFO's this year.  So, despite lack of enthusiasm - because any project that drags on far too long just isn't all that interesting anymore - I did finish!
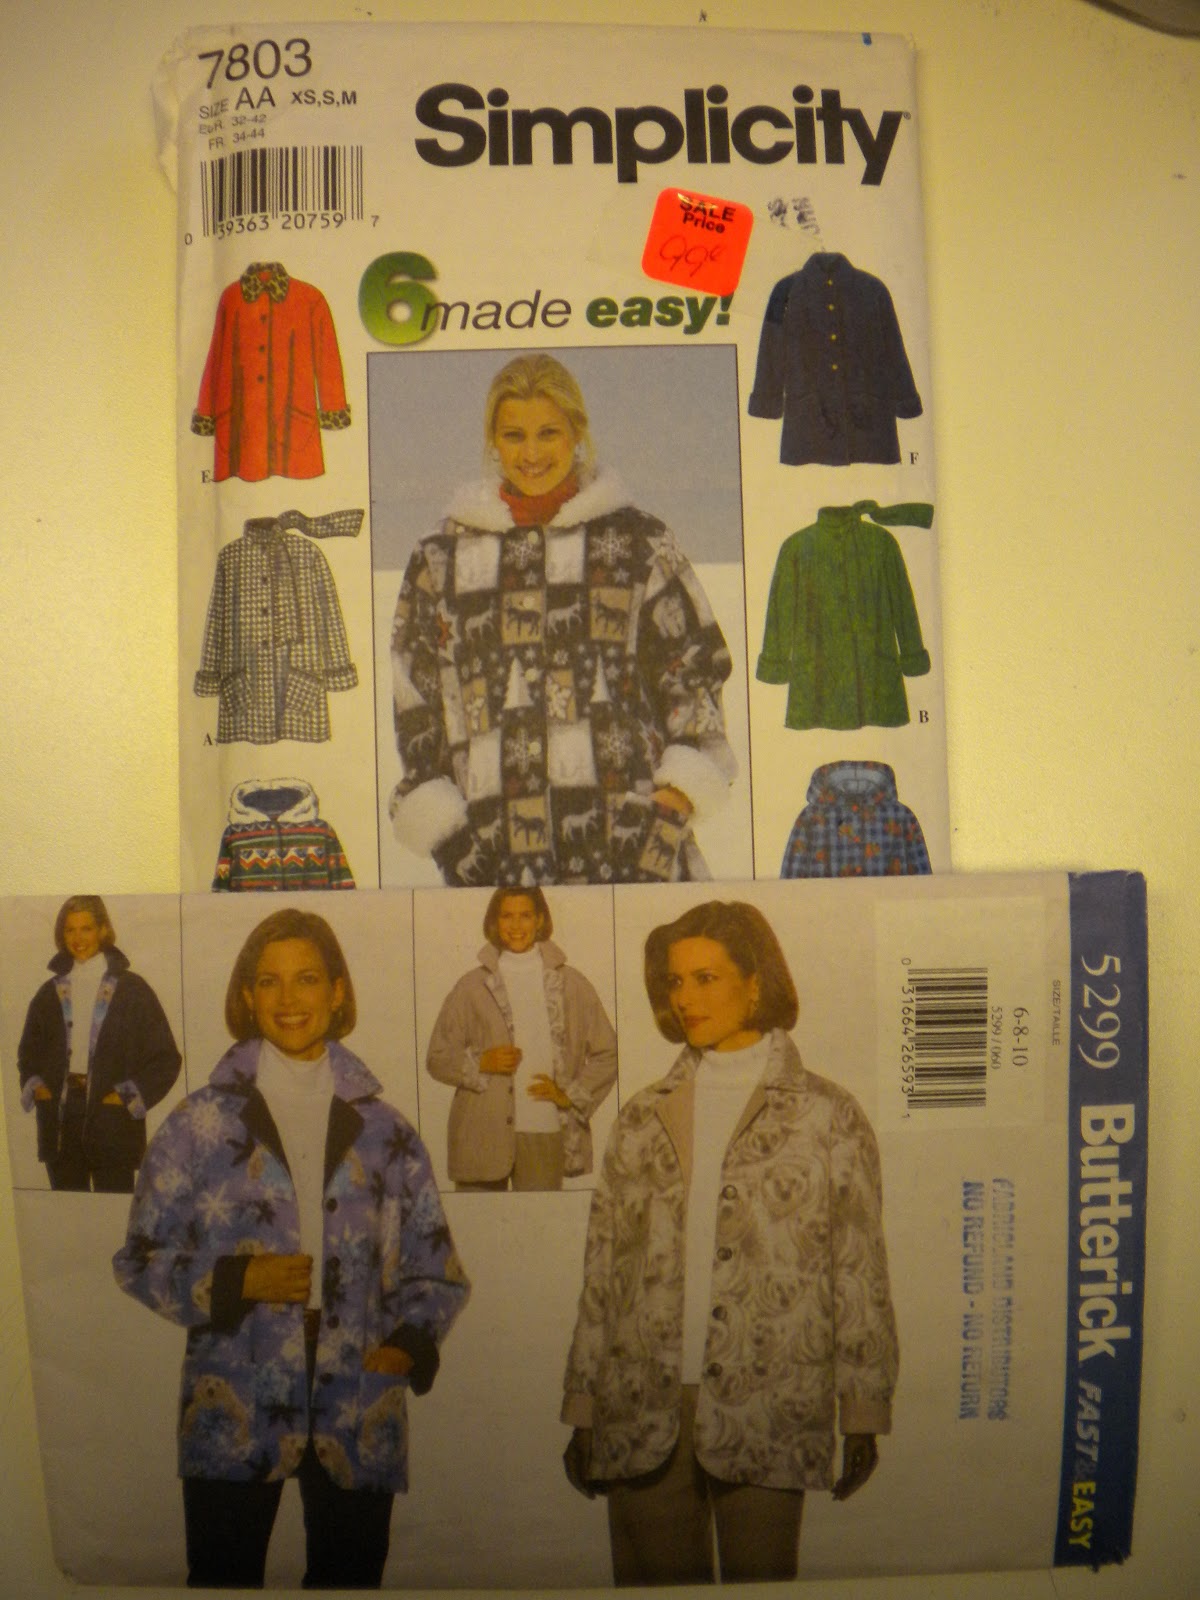
Ah - pattern used - um - some combination of these two  - extended to full length.  I only had a remnant, and I was determined to get a full - length coat out of it.  Talk about zero-waste cutting!  This is all one layer -- no lining -- no facings.  And to make up for the lack of collar - I "just happened to have" a suitable piece of challis for a scarf.
So - a few more pictures...
no scarf view
back view
I was not going to mess with buttonholes or any other closures that could potentially mess up this coat!  Snaps were the order of the day - sewn very carefully through only one layer so's not to show on the outside.
Only downfall of this coat - no pockets!!!  Oh well, life just can't be perfect, now can it?
What took so long?  ... construction details to follow in the next post (yes, I took pictures!)  This post is long enough for my first post in over 3 months!!!
Oops!  Almost forgot - I do have a picture of "coat in action".
Trying to teach Mum to take the pictures - this one's not too bad, she only cut off my head